
It is recommended to set up Azure API Management (APIM) backup. Here are some reasons why:
- Data Protection: Backing up your APIM ensures that you have a copy of your APIs, policies, and configurations. In case of accidental deletion, data corruption, or any other issue, you can restore your APIM service to a previous state.
- Disaster Recovery: In the event of a disaster, such as a region-wide outage or other catastrophic events, having a backup allows you to restore your APIM service in another region quickly.
- Compliance and Audit: Some industries have regulatory requirements for data backup and recovery. Having regular backups ensures you comply with these regulations and can provide necessary audit trails.
- Version Control: Regular backups allow you to maintain a version history of your API configurations and policies. If you need to revert to a previous version due to issues with new changes, backups make this process easier.
- Business Continuity: Ensuring that your API management service can be restored quickly helps maintain business continuity, reducing downtime and impact on users.
Unfortunately, you cannot directly backup the APIM from Azure Portal. You have to use Azure CLI or PowerShell command to back an APIM. Alternatively, you can invoke the API Management API to trigger the backup action. To backup Azure APIM instance follow the steps below.
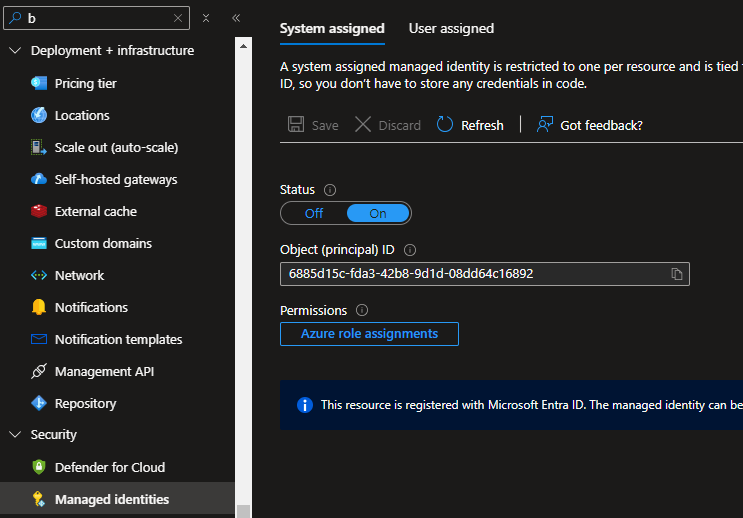
Enable System Assigned Identity
Login to the Azure portal and browse your APIM instance. Click on the Managed Identities under the security section in the left navigation, see the screenshot below. Turn the System assigned identity on.
Create storage account
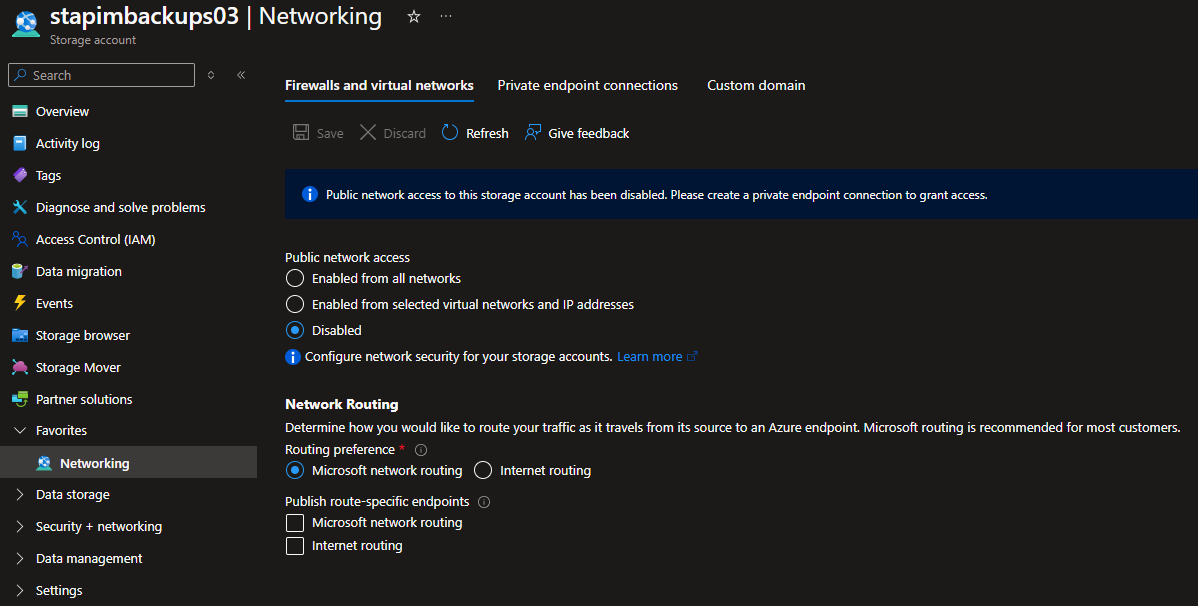
You need a Storage account to store the backup of the APIM. So, create an Azure Storage account and then create a container called backups to store the backup files. Leave all the default settings when creating the storage account but disable the public access for security so that it’s not accessible from the public domain.
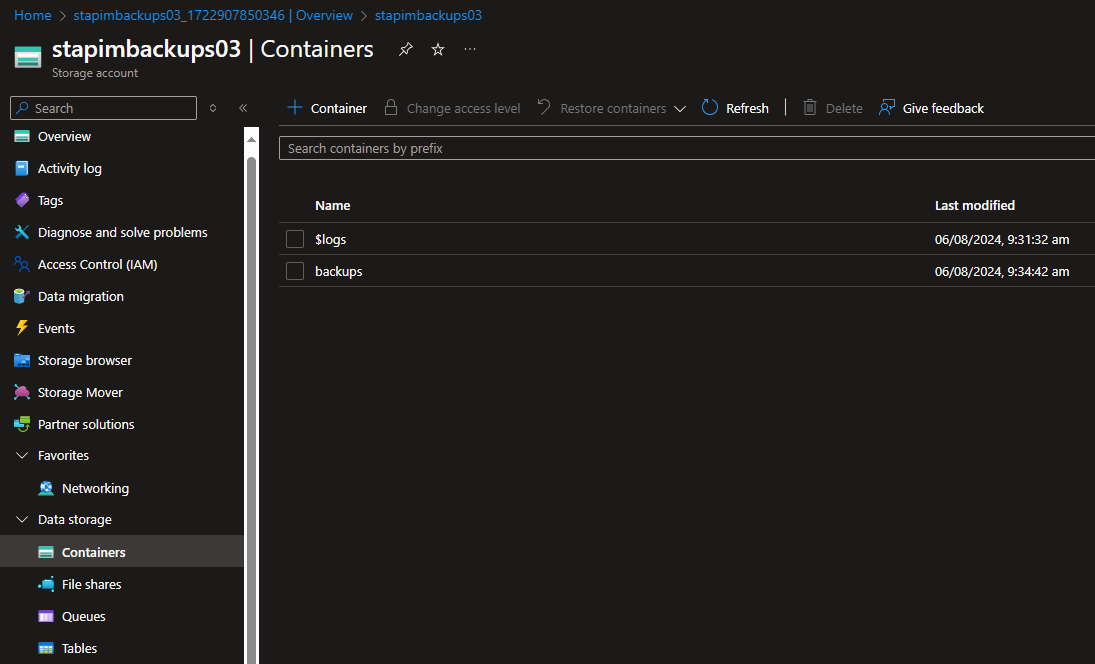
Create container
Create a container called “backups” to store the APIM backup files. This container will be private by default since public access was disabled on this storage account.
Grant access to Storage account
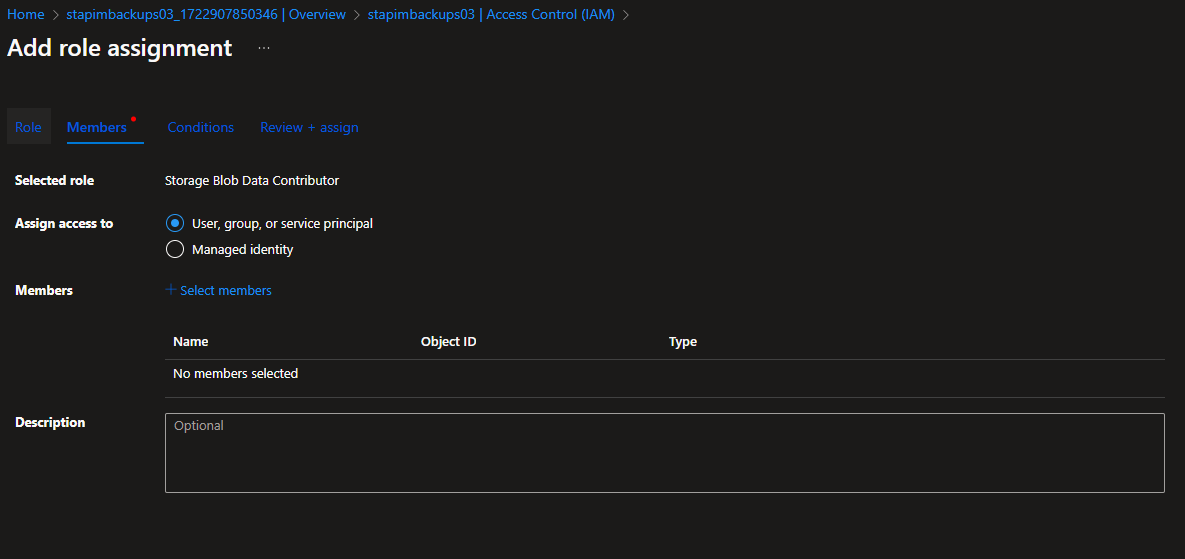
You need to grant access to the Storage account for the APIM so that it can write backup files to the storage account. Remember even though you’re logged in to Azure using Powershell and you have owner access to the Storage account, however, when you execute the backup command the APIM instance requires access to the storage account.
Assign Storage Blob Data Contributor to the APIM instance by clicking on the Access control (IAM) in the left navigation then click on the Add role assignment button, see the screenshot below.
Execute the backup command
Now your environment is ready to execute the backup commands in Power Shell. Login to Azure from Windows PowerShell.
Login-AzAccount
This will open an interactive browser to login to your account. Once you logged in, you can close the browser. You need to select the right Azure subscription if you have multiple subscriptions. So, use the following commands to show the list of subscriptions and set the current subscription where the APIM instance resides.
Get-AzSubscription

Set-AzContext -Subscription ac34d1b0-d59e-413f-ca8d-3d57b5234bf7
Now set the variables and execute the backup command. This may take a few minutes depending on the size of your APIM instance.
$apiManagementName="apim-test-01";
$apiManagementResourceGroup="arg-cits-01";
$storageAccountName="stapimbackups03";
$storageResourceGroup="arg-cits-01";
$containerName="backups";
$blobName="apim-test-01.apimbackup"

$storageKey = (Get-AzStorageAccountKey -ResourceGroupName $storageResourceGroup -StorageAccountName $storageAccountName)[0].Value

$storageContext = New-AzStorageContext -StorageAccountName $storageAccountName -StorageAccountKey $storageKey

Backup-AzApiManagement -ResourceGroupName $apiManagementResourceGroup -Name $apiManagementName -AccessType 'SystemAssignedManagedIdentity' -StorageContext $storageContext -TargetContainerName $containerName -TargetBlobName $blobName -Debug
Remember you have to add the -AccessType flag in the command otherwise, it may fail. You can also use the -Debug flag for debugging information.
Once the backup is completed, check the storage account container and make sure the backup file exists.

Restore APIM
To restore the APIM from a backup, execute the following script once you login to Azure account using Windows PowerShell.
$apiManagementName="apim-test-01";
$apiManagementResourceGroup="arg-cits-01";
$storageAccountName="stapimbackups03";
$storageResourceGroup="arg-cits-01";
$containerName="backups";
$blobName="apim-test-01.apimbackup"

$storageKey = (Get-AzStorageAccountKey -ResourceGroupName $storageResourceGroup -StorageAccountName $storageAccountName)[0].Value

$storageContext = New-AzStorageContext -StorageAccountName $storageAccountName -StorageAccountKey $storageKey

Restore-AzApiManagement -ResourceGroupName $apiManagementResourceGroup -Name $apiManagementName -AccessType 'SystemAssignedManagedIdentity' -StorageContext $storageContext -SourceContainerName $containerName -SourceBlobName $blobName
Read the details documentation on setting up disaster recovery on the Microsoft Website here.
You can also setup a logic app to invoke the API Management to backup the APIM instance, details and documentation can be found here.