
STEP 1: – Create a Service Bus Namespace account
To create a service bus account login to the Azure portal. You need to have an active subscription to create resources in the Azure portal. Click on the Integration from the left navigation or you can search for the Service Bus using the search box. See the screenshot below for your reference.
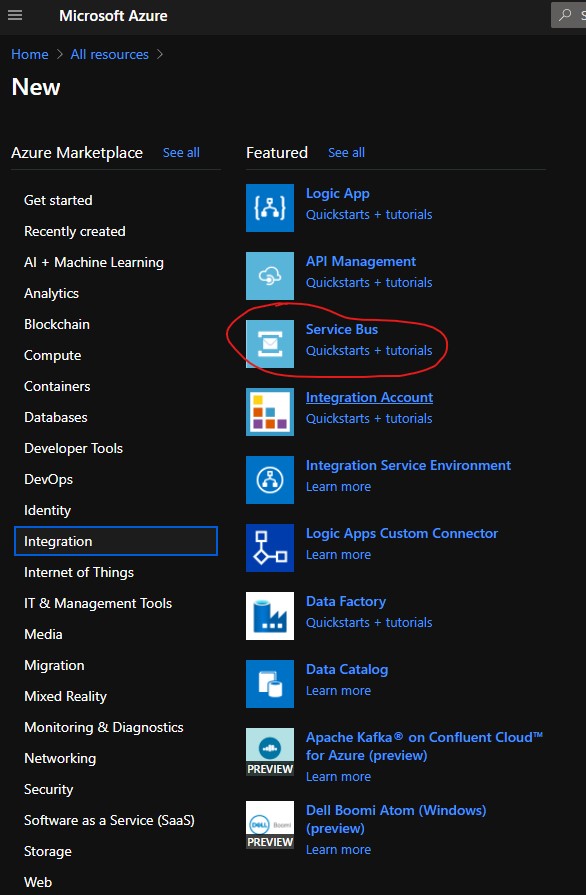
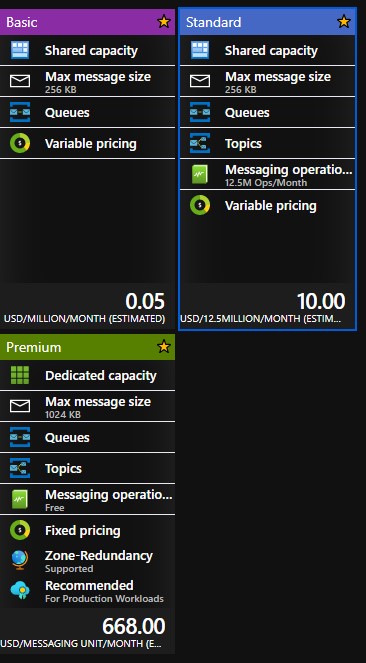
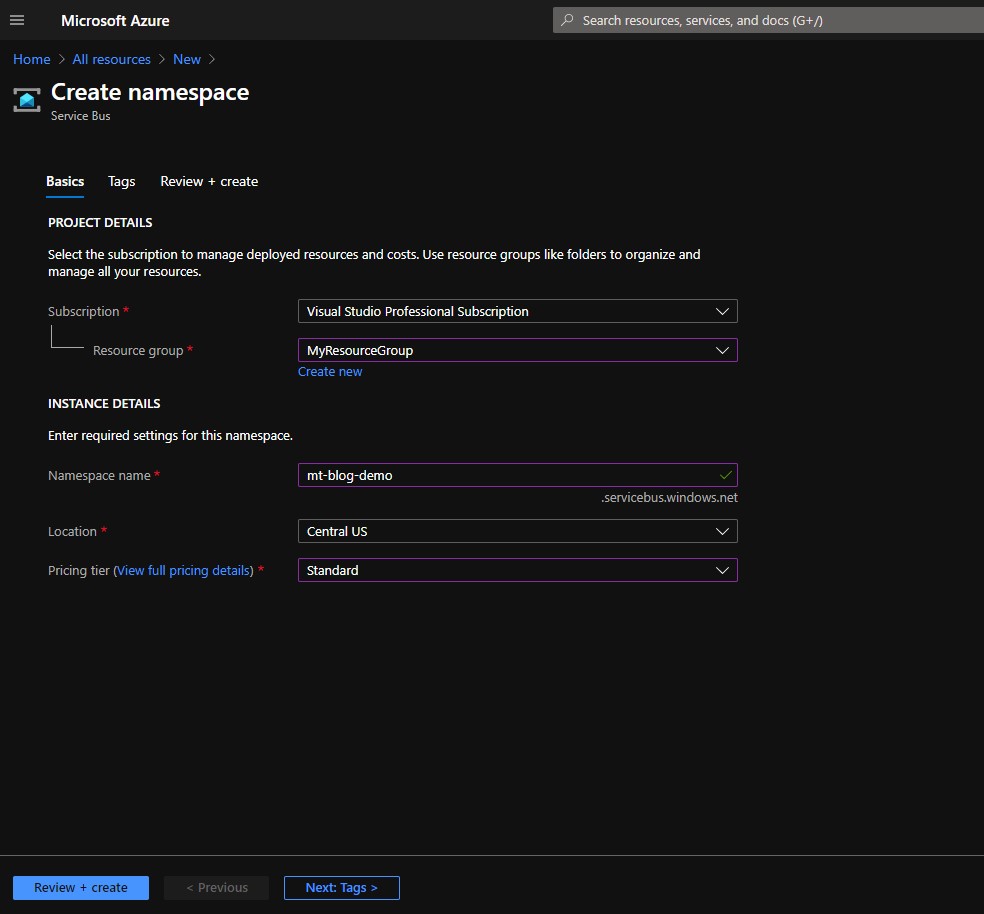
Click on the Service Bus and enter the information required for creating a service bus account. Note, the Namespace name has to be unique since it generates an endpoint for the service bus account. Premium pricing tier allows 1024KB message size and Standard tier allows 256KB message size. You need to have at least standard pricing tier to use the Topic feature. Basic tier does not have the Topics available. For this demo I am using Standard subscription since it enables the topic. So basically the fundamental difference between Service Bus Topic and Queues is Topic uses subscription to distribute the messages to different subscribers and it does not disappear until subscribers receive the messages. Queues delivers the messages only in one channel.
STEP 2: Create a Topic
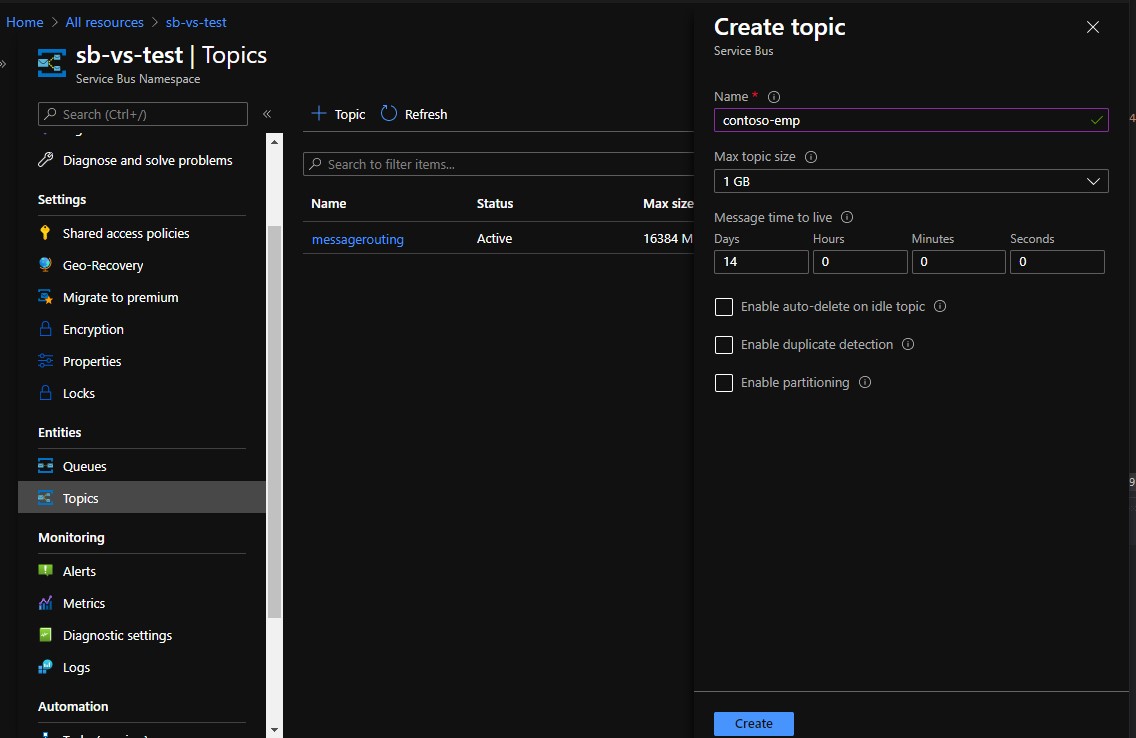
Once Service Bus Namespace account is created, click on this account to display the details. Let’s create a Topic under the Entities section in the left.
Now we need to get the connection string for the service bus account. To get the connection string, click on the service bus account link from the breadcrumb then under the Settings section click on the Shared Access Policies. Now click on the default policy RootManageSharedAccessKey to display the connection string and keys. You can create a custom policy here if you like to grant different privileges.
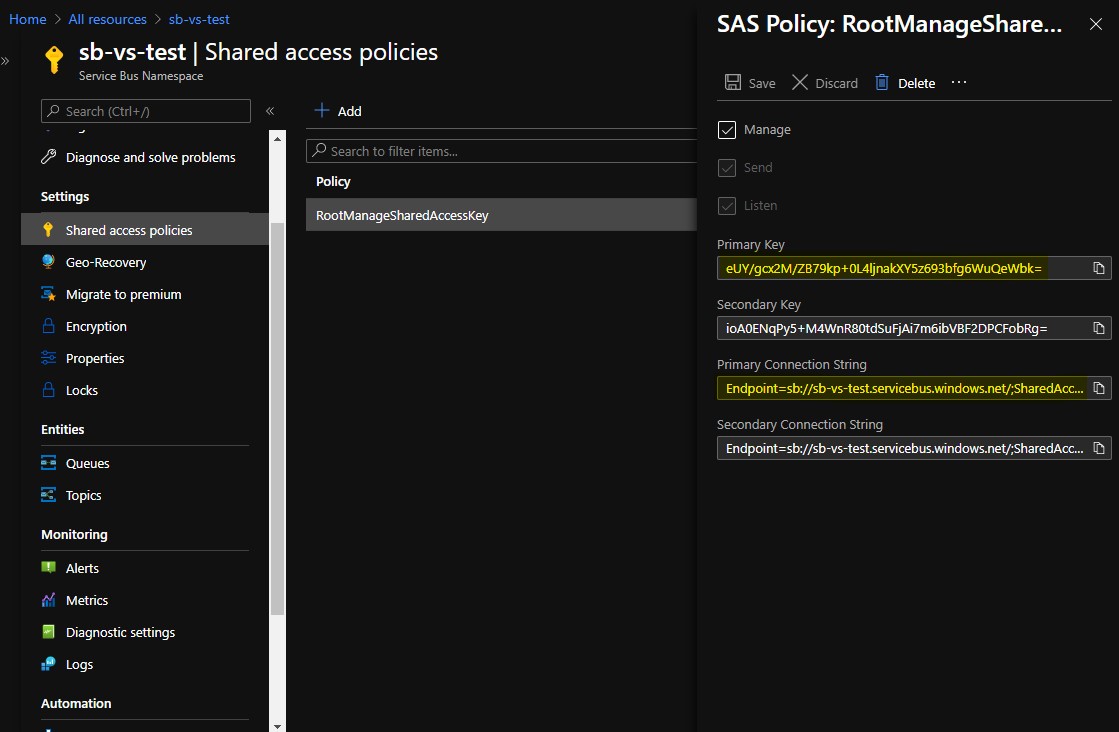
Copy the Primary connection String to a notepad because we will be using this in the dotnet core application to send messages to the topic.
STEP 3: Create a DotNet Core console application
Now our service bus and topic is ready to receive messages. Let’s create an dotnet core application. You can create a dotnet core console app using Powershell CLI or from Visual Studio. Use your preferred method.
dotnet new console --name TopicMessageSender
Open PowerShell window and run the above code. This will create a dotnet core console app. Now open the application in Visual Studio to modify the default code and add an Azure package.

[attention title=”Change .NET Core Version”]Make sure you select .Net Core 2.1 version since it does not support 3.0 or above version when I am doing this demo. You can change the version by right clicking on the project in the Visual Studio Solution explorer then click on the properties at the bottom. [/attention]
STEP 4: Add the codes in the .Net Core application
Add the code in the Program.cs file. You initialise the connection string and topic name first.
// get the connection string for the service bus from the Azure portal
        const string ServiceBusConnectionString = "Endpoint=sb://sb-vs-test.servicebus.windows.net/;SharedAccessKeyName=RootManageSharedAccessKey;SharedAccessKey=eUY/gcx2M/ZB79kp+0LfsdfsljnakXY5z693bfg6WuQeWbk=";
        // name of the topic created on the Azure portal
        const string TopicName = "contoso-emp";
        static ITopicClient topicClient;
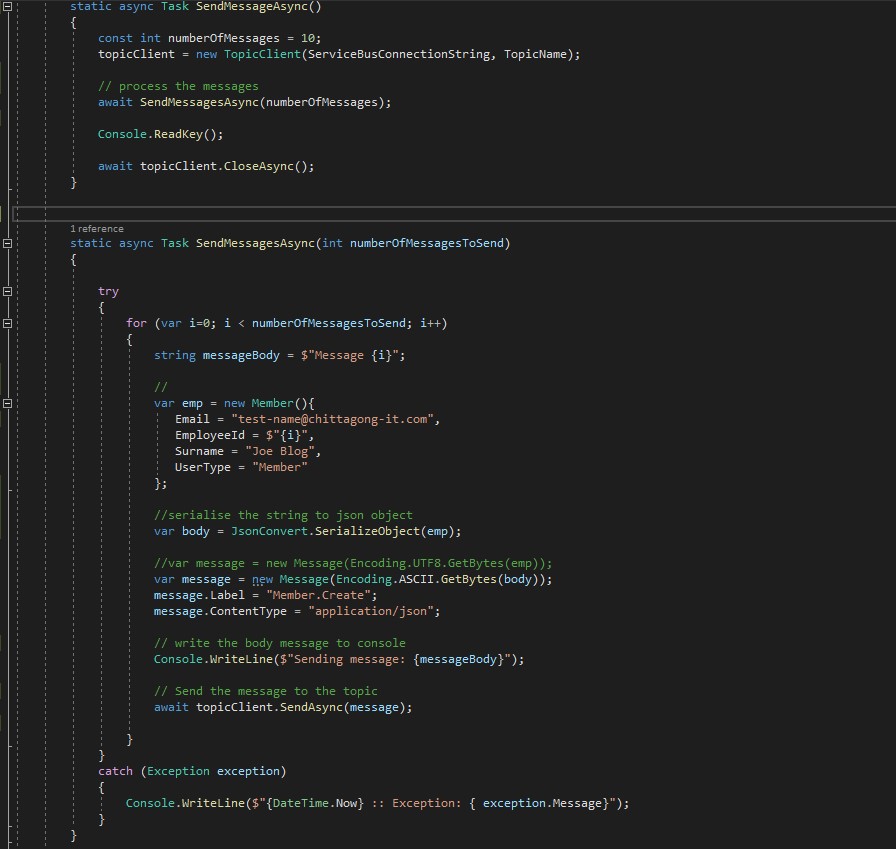
See the complete code for this async method below –
 class Program
    {

        // get the connection string for the service bus from the Azure portal
        const string ServiceBusConnectionString = "Endpoint=sb://sb-vs-test.servicebus.windows.net/;SharedAccessKeyName=RootManageSharedAccessKey;SharedAccessKey=eUY/gcx2M/ZB79kp+0L4ljnakXY5z693bfg6WuQeWbk=";
        // name of the topic created on the Azure portal
        const string TopicName = "contoso-emp";
        static ITopicClient topicClient;


        static void Main(string[] args)
        {
            //Console.WriteLine("Hello World!");
            //send message to topic
            SendMessageAsync().GetAwaiter().GetResult();

        }

        static async Task SendMessageAsync()
        {
            const int numberOfMessages = 10;
            topicClient = new TopicClient(ServiceBusConnectionString, TopicName);

            // process the messages
            await SendMessagesAsync(numberOfMessages);

            Console.ReadKey();

            await topicClient.CloseAsync();
        }


        static async Task SendMessagesAsync(int numberOfMessagesToSend)
        {

            try
            {
                for (var i=0; i < numberOfMessagesToSend; i++)
                {
                    string messageBody = $"Message {i}";

                    //
                    var emp = new Member(){
                       Email = "test-name@chittagong-it.com",
                       EmployeeId = $"{i}",
                       Surname = "Joe Blog",
                       UserType = "Member"
                    };

                    //serialise the string to json object
                    var body = JsonConvert.SerializeObject(emp);

                    //var message = new Message(Encoding.UTF8.GetBytes(emp));
                    var message = new Message(Encoding.ASCII.GetBytes(body));
                    message.Label = "Member.Create";
                    message.ContentType = "application/json";

                    // write the body message to console
                    Console.WriteLine($"Sending message: {messageBody}");

                    // Send the message to the topic
                    await topicClient.SendAsync(message);

                }
            }
            catch (Exception exception)
            {
                Console.WriteLine($"{DateTime.Now} :: Exception: { exception.Message}");
            }
        }
}
In the above code I am passing a json object as message content. See the Member model below –
 public class Member
        {
            public string EmployeeId { get; set; }
            public string Email { get; set; }
            public string Surname { get; set; }
            public string UserType { get; set; }
        }
Once you ready now run the application either using dotnet run from the PowerShell command or use F5 to debug the application in Visual Studio. You have done everything correctly, you should see the message in the console like below. 10 messages sent successfully.
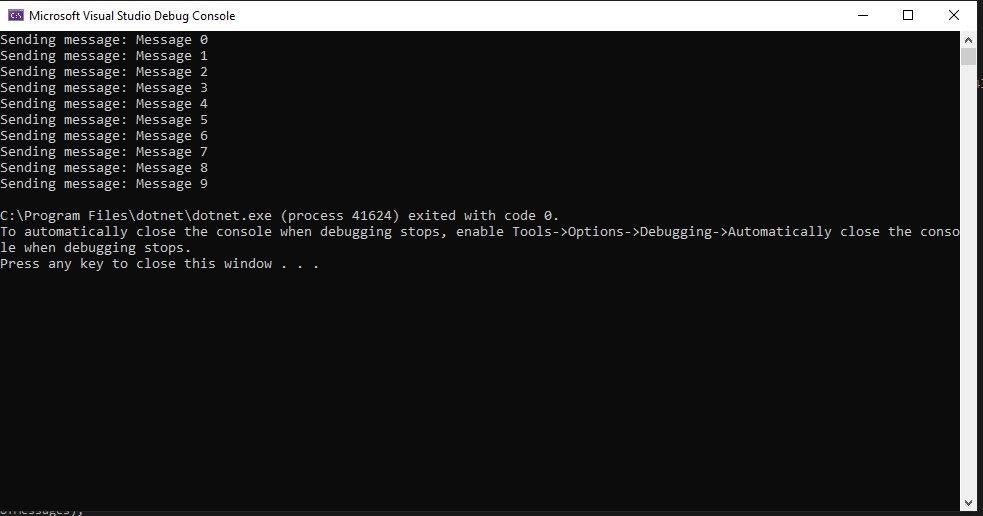
Press any key to stop the debugging. Now let’s see if we can find the messages in the azure portal. Eventhough the messages were send to Azure portal but I was not able to see them because I have not created any subscription to receive the messages. So remember to create a subscription before you sending messages to the Topic. See the subscription I have created below.
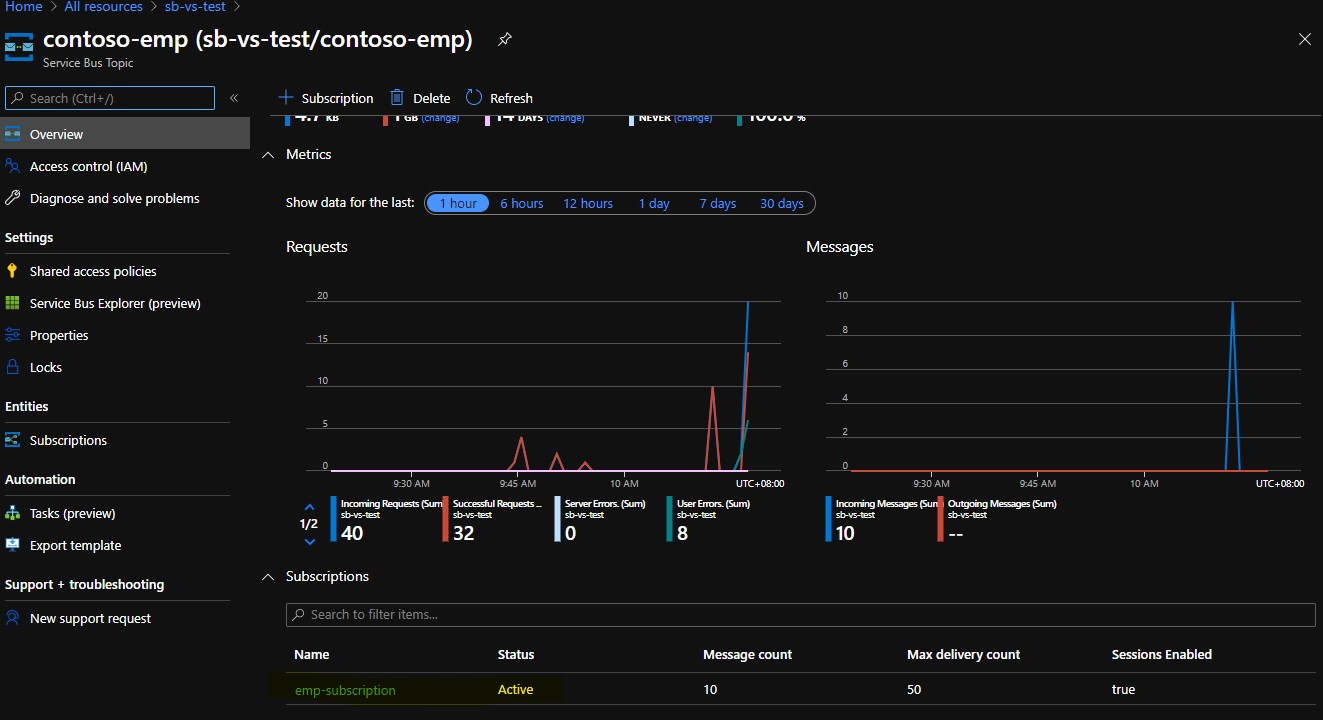
You can see in the subscription, there are 10 messages waiting in the queue for me to process. To view the messages, click on the Service Bus Explorer from the left navigation panel.
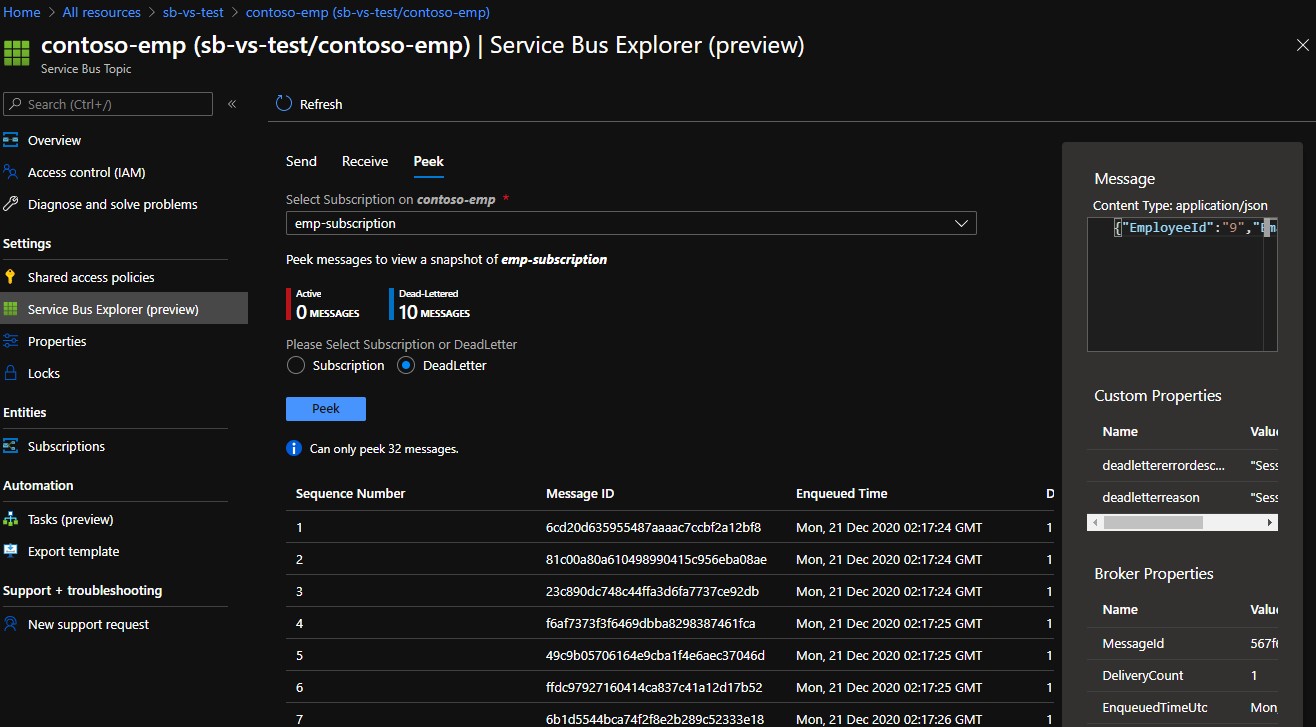
You can see the sample messages in the queue like above picture. I am using deadletter in this example since there was no active messages. But you get the idea.
Feel free to ask questions.
Hi sir, this blog is very useful…I am getting exception error like cannot open a Topic client for entity type queue..How to resolve this..
Thanks